



Here is the principle that separates good outdoor lighting from bad, and almost nobody starts here: outdoor lighting design is about deciding what stays dark.
Indoors, you light a room. Outdoors, you have no ceiling, no walls, and no upper limit on how much space you could fill with light. Try to light everything and you get a flat, glaring, over lit garden that nobody wants to sit in. Light three things well and leave the rest in shadow, and you get depth, mystery and a space that works after dark.
Restraint is the technique. Everything below is how to apply it.
Start by walking the space at night
Before choosing a single fixture, go outside after dark and walk your garden.
Note where you actually go: the path from the car, the route to the bins, the steps. Note what you would want to look at: a tree, a wall, a water feature. Note where you sit. Note what already lights the space, spill from windows, a streetlight, a neighbour's security floodlight.
Most people skip this and buy fixtures first. It is why so many gardens end up with lights in places nobody walks, and darkness where everyone does.
Layer one: safety and navigation
This is the layer that has to exist. Steps, level changes, the path to the front door, anywhere someone could turn an ankle.
The rule here is low and frequent, not tall and bright. A line of small, low outputs along a path lets you see where you are going. One bright pole light in the middle of the garden creates a bright patch and makes everything beyond it look darker, because your eyes adjust to the bright thing.
Light steps specifically. As with indoor stairs, the eye needs to find the edge of each tread. Light aimed across a step reveals the edge. Light aimed flat at it does not.
For paths and boundaries, LED garden ball lamps, from $300, sit low and read as objects in daylight as well as light sources at night.
Layer two: the features worth showing
This is where the design happens, and where the discipline matters. Choose two or three features. Not eight.
The techniques are worth knowing by name, because they produce completely different effects.
Uplighting puts a light at the base of an object aiming up. On a tree with structural branches, or a textured wall, this is the most dramatic technique available. It is how you make a mature tree the centrepiece of a garden.
Grazing sets the light very close to a textured surface so it rakes across it. On brick, stone or render, the low angle catches every irregularity. On a smooth surface it does nothing, so save it for texture.
Silhouetting lights the surface behind an object and leaves the object dark. It is the opposite instinct to everything else here, and it is stunning on plants with a strong outline.
Moonlighting mounts a soft light high in a tree, aiming down through the branches. It throws dappled shadow onto the ground below and reads as natural, because it is imitating something natural. It is the most sophisticated technique in the list and the one guests never quite work out.
Shadowing lights an object from the front so it throws its shadow onto a wall behind. Cheap to do, and it doubles the visual impact of one plant.
Pick two or three. A garden where everything is lit has no focal point, and no depth.
For feature and decorative pieces, look at the NYRA Aura Lantern, from $539, the NYRA Mystical Island Lamp, from $880, and the NYRA Flower Pot Table Lamp, from $950.
Layer three: the places you sit
Terraces, dining areas and seating want the least light in the whole scheme, and the warmest.
The reason is simple. You are outdoors in the evening because it is not indoors. Light a terrace to indoor levels and you have built a room with no roof, and you have lost the sky.
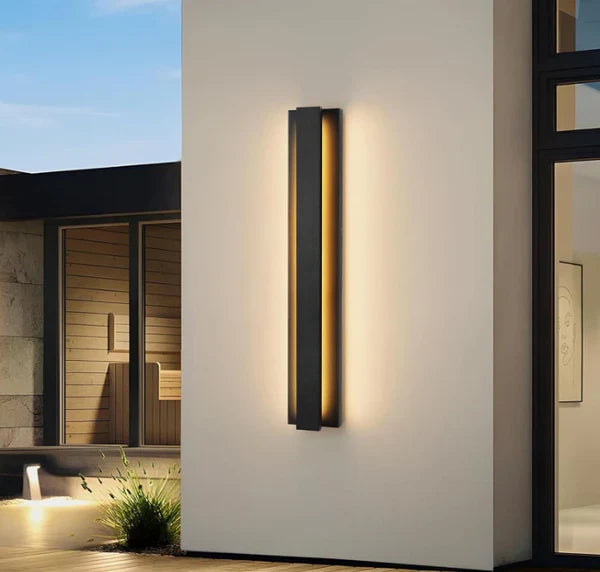
Keep it low, keep it warm, and keep the source out of sightlines. Wall lights around a terrace should be positioned so a seated person never sees the lamp itself. See outdoor wall lighting for options such as the Vetrana Modern Outdoor Sconce, from $145, and the Olivia outdoor wall lamp, from $300.
The house itself
Your facade is part of the garden view, and lighting it well gives the whole space a backdrop.
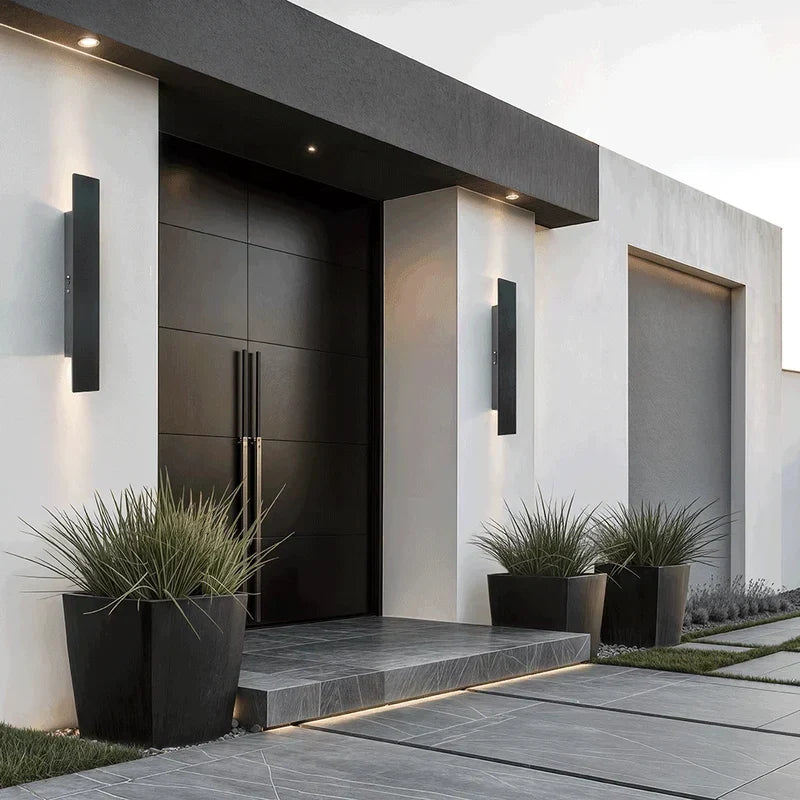
Two wall lights either side of the front door, at roughly 1.6m to 1.7m, is the standard and the best. Up and down fixtures on a textured elevation give the contemporary double cone effect. The Zoya Outdoor Marble Wall Light, from $245, the Arlen Outdoor Wall Light, $289, and the NYRA Outdoor LED Wall lamp, from $400, all suit this.
As with the garden, pick the good elevations and leave the rest dark.
Specification: IP ratings and materials
IP44 is the minimum for sheltered positions such as under an eave. IP65 for anything fully exposed to driving rain. Anything in or near water needs a higher rating again, and that is a conversation to have with an electrician rather than a guess to make.
Materials matter as much as ratings, especially near the coast, where salt air destroys weak finishes. Marble and stone bodies do not corrode, which is why they feature heavily in NYRA's outdoor range. The Brighton Acrylic Outdoor Wall Lamp, from $259, and the Phillips IP65 Waterproof Wall Lamp, from $230, are specified for exposure.
All outdoor wiring should be installed by a qualified electrician, and outdoor circuits have specific requirements that vary by country. NYRA fixtures are made to your destination country's voltage, wiring and certification requirements.
Colour temperature and the one number that matters
Warm white, 2700K to 3000K, for essentially everything outdoors that people look at or sit near. It flatters, it reads as welcoming, and it looks like firelight rather than a car park.
The exception is foliage. Some designers use slightly cooler light on green planting because it renders leaves more naturally, and warm light can make greenery look yellow. If you try it, keep it subtle and keep it away from seating.
Cool white belongs on security lighting only.
The most important rule is consistency. A warm porch light beside a cool floodlight is visible from the street and it looks like an accident.
Controls, and being a good neighbour
Put your outdoor lighting on a timer or a smart control. Lighting a garden nobody is in at 2am is a waste, and it annoys everyone whose bedroom faces it.
Motion sensors belong on utility routes, side returns and bins, where you want light briefly and rarely. They do not belong on a feature tree, and they do not belong on a front door where they will trigger all night.
Two responsibilities worth taking seriously. Check where your light actually lands, not where you assume: spill into a neighbour's bedroom window is the most common cause of outdoor lighting disputes. And avoid aiming fixtures at the sky. It wastes light, it contributes to light pollution, and it is increasingly restricted in some areas. Point light at surfaces you want to see.
The mistakes to avoid
Lighting everything. The most common and the most damaging. Contrast is what creates depth.
Runway effect: identical lights evenly spaced down both sides of a path. It looks like an airfield. Stagger them, or use fewer.
Bright uplights aimed into sightlines from seating.
Mixed colour temperatures across one view.
Cheap fixtures on exposed walls. Two winters is all it takes.
Buying fixtures before walking the garden at night.
A plan
-
Walk the garden after dark, note routes, features, seating, existing light.
-
Light the routes and the steps, low and frequent.
-
Choose two or three features and pick a technique for each.
-
Light seating areas last, lowest and warmest, sources out of sightlines.
-
Light the entrance and one good elevation of the house.
-
Set one colour temperature, warm, across the whole scheme.
-
Specify IP65 for anything exposed, IP44 minimum under shelter.
-
Put it all on a timer, and check nothing spills next door.
-
Leave everything else dark, on purpose.
Planning a scheme?
NYRA offers free one to one video consultations. Send photos of your garden and elevation and the team can advise on fixtures, finishes and placement. Fixtures can be customised on size, finish, light colour and voltage.
Browse outdoor lighting, or book a free consultation.
FAQ
What is the most important principle in outdoor lighting design?
Deciding what to leave dark. Contrast creates depth. A garden where everything is lit evenly has no focal point and looks flat.
What IP rating do garden lights need?
IP44 minimum for sheltered spots, IP65 for anything exposed to driving rain. Anything in or near water needs a higher rating and specialist advice.
What colour temperature should outdoor lighting be?
Warm white, 2700K to 3000K, for almost everything people see or sit near. Cool white belongs on security lighting. Keep one temperature across any single view.
How do I light a tree?
Uplighting from the base is the most dramatic and suits trees with structural branches. Moonlighting, a soft light mounted high in the canopy aiming down, produces dappled shadow and reads as the most natural.
How bright should a patio be?
Much dimmer than you think. Outdoor spaces work in the evening because they are darker than indoors. Light enough to move safely and see faces, with the source out of seated sightlines.


Leave a comment
All comments are moderated before being published.
This site is protected by hCaptcha and the hCaptcha Privacy Policy and Terms of Service apply.